Hello Everyone,
Welcome to Front Porch Friday where the
Front Porch Kits Design Team
tells you about some of our favorite projects.
For the Just Add Water kit my favorite
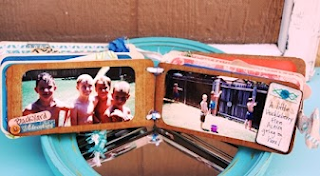
project was made using the Maya Road PLAY chipboard album.
I swapped the front cover (Play) for a solid chipboard page
so that I could title my album from the theme of our kit.
For this little book I gathered some of the water pictures
that I had taken over the years. Because there were several I decided to add a
few corrugated pages from the kit box, by using a page of the album as a template.
It is a little watery stroll down memory lane because the
pictures start when my kids were 3,4 and 7 years old.
(They are now much, much older then that.)
(They are now much, much older then that.)
For the binding I used the Wedding Dress Artsy Fibers to allow
my album some expandability when I am ready to add more pages.
Of course there will be more.
I used the sticker sheet from Graphic 45, included in the kit,
to title my pages along with my Doodletype Cricut Cartridge to
cut the word "Fun".
More of the Artsy Fibers are added to the Destination tag.
I used a punch on the sandpaper to make the flower. (I shouldn't use punches on sandpaper and I don't recommend doing this, but I did it anyways.)
I then cut a couple of the swimsuits from the Websters Pages cards paper.
And more G45 sticker titles.
I cut the word "Sand" from the sandpaper also. Too cool!
(Doodletype font again and the Cricut didn't complain about the rough cutting).
I then stamped an image from some beachy stamps
I have collected over the years onto the Vanilla cardstock.
HINT: to get the most out of your kits, keep aside those little scraps while working on your project
for your stamped embellishments so that you don't have to always cut into your larger pieces.
When your project is complete then toss if you are not a scrap hoarder keeper like me! :D
Here is where I added the original title from
the album. It worked in perfectly to make my
continuation title "& PLAY at the Waterpark."
The little water swirl is a ProveoCraft die I had.
I used it on the blue cardstock included in the kit.
The chipboard was painted and sanded to give it a
distressed effect. The banner I free hand cut and folded.
I also added some "water splashes" using Glossy Accents.
All of the ribbon and buttons used here are also included in the kit,
along with a variety of journal cards. And do you see that little blue
tassel peeking out from under the book?
Here's how I made it:
1. Cut about a 1" length of tubing.
2. Snip down or fringe about 3/4" into the tubing at about 1/8" increments around.
3. Holding the base of the tubing with long tweezers,
heat the fringed side with a heat gun until fringes start to
soften and bend backwards to look like a tassel.
4. Then set tassel, fringe side down, onto a craft mat to cool and set.
...You can give color to your tassel using alcohol inks.
I used Pool Alcohol Ink on mine.
I also used the tubing as spacers between my pages, for the thicker
embellishments, by clipping 1/4" pieces.
There are some very clever uses of the same clear
tubing on the other DT projects. Keep your eyes peeled for them.
I love the May Arts 2" wide canvas ribbon from the kit.
It made a great chunky knot for this page.
The wood Popsicle stick made a perfect stamped
sign for our fishing excursion to Big Bear Lake and the
colorful skewers and twine made a great fishing pole.
These wood elements are so versatile.
A soothing sunset to end on, for now...
The twine threaded through the button was inspired by
a Pinterest post I saw recently. I loved it and had to use it.
Yes! There are still a few kits available. If you would like one,
click here: www.thelittlebluehouseonline.com
and place an order.
OR
Call the Little Blue House at 817-431-7930
OR
Stop by the Little Blue House and pick one up today!
We are located in Old Town Keller at:
118 W. Olive Street,
Keller, Texas 76248
Thank you for dropping by my little blog.
Now I am going to do a little bloghopping to see what the
rest of the FPK DT is showing today.
The list is posted on my sidebar. Please join me.
Rhonda


Love all the little details and the binding. Great idea for adding pages later on!
ReplyDeletewow what a wonderful book Rhonda.....love all the patterns and photos, especially the one of the sunset x
ReplyDeleteWonderful book! So many creative details and I love what you did with the tubing!
ReplyDeleteAbsolutely fabulous book Rhonda!! Love all of the little details that end up having such a big impact.
ReplyDelete